Please read my Terms (TOU) before doing the tutorial.
Thank you for putting a link to this tutorial by showing your realization on a website, forum or in an email!
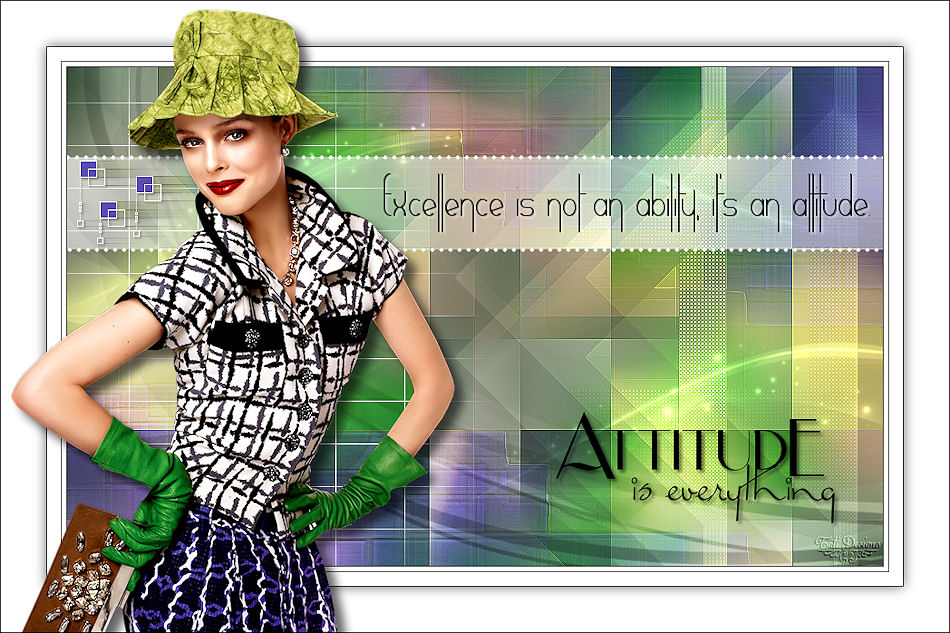
With your result, you can make signatures, websets, incredimail letters, etc.
Please, credit to Tati Designs, thank you.
Materials
PSPX9 (you can use any version).
 To do this tutorial you will need a main tube.
Download the tutorial material here:

Filters:
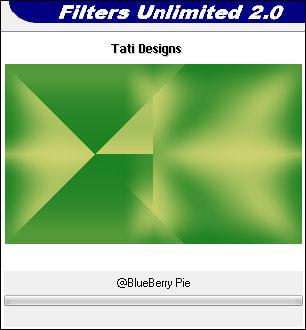
&<Bkg Kaleidoscope> / @BlueBerry Pie (download here).**
Mehdi / Sorting Tiles (download here).
AFS Import / Sqborder2 (download here).
Italian Editors Effect / Effeto Fantasma (download here).
Toadies / What are you? (download here).
Richard Rosenman / Grid Generator (download here).
** Import this filter with "Unlimited".

IMPORTANT
It is forbidden to modify or rename files or remove the watermark.
Please do not use the material provided outside this tutorial.
Main tube by Gabry.
The rest of the material used in the tutorial is mine.
Preparation
Duplicate the tubes. Close the originals.
Install the Filters in the "Plugins" folder of your PSP.
In the "Selecciones" folder are 2 files, put them in the "Selections" folder of your PSP.
Colors
Choose a light color, a dark color and another contrasting color in harmony with your tube.
If you use other colors, you must play with the Blend Mode and the Opacity of the layers.
This is the tutorial palette:

≈ Step 1 ≈
In your Materials palette:
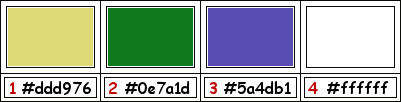
Set your Foregroundcolor to (1) #ddd976 
Set your Backgroundcolor to (2) #0e7a1d 
≈ Step 2 ≈
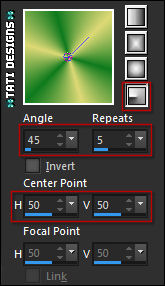
Set your Foregroundcolor to "Foreground/Background" Gradient (Corel_06_029):
≈ Step 3 ≈
Open a new transparent image of 900 x 550 pixels.
≈ Step 4 ≈
Fill your transparent image with the foreground gradient.
≈ Step 5 ≈
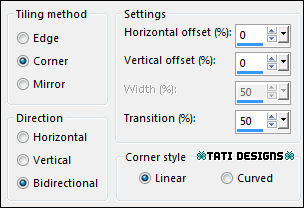
Effects / Image Effects / Seamless Tiling (default):
≈ Step 6 ≈
Adjust / Blur / Gaussian Blur to 30.
≈ Step 7 ≈
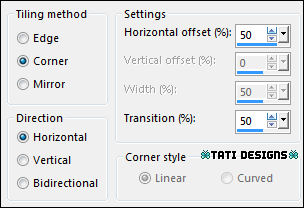
Effects / Plugins / Unlimited / &<Bkg Kaleidoscope> / @BlueBerry Pie:
≈ Step 8 ≈
Image / Mirror.
≈ Step 9 ≈
Effects / Image Effects / Seamless Tiling:
≈ Step 10 ≈
Effects / Edge Effects / Enhance.
≈ Step 11 ≈
Image / Mirror.
≈ Step 12 ≈
Layers / New Raster Layer.
≈ Step 13 ≈
Selections / Select All.
≈ Step 14 ≈
Open the main tube of your choice and copy.
Go back to your work and paste into selection.
≈ Step 15 ≈
Selections / Select None.
≈ Step 16 ≈
Effects / Image Effects / Seamless Tiling (default):
≈ Step 17 ≈
Adjust / Blur / Gaussian Blur to 35.
≈ Step 18 ≈
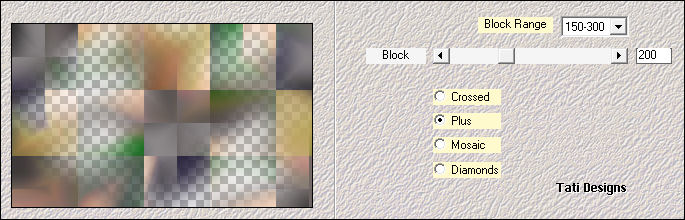
Effects / Plugins / Mehdi / Sorting Tiles:
≈ Step 19 ≈
Effects / Edge Effects / Enhance.
≈ Step 20 ≈
Lower the Opacity to 80.
≈ Step 21 ≈
Layers / Merge / Merge Visible.
≈ Step 22 ≈
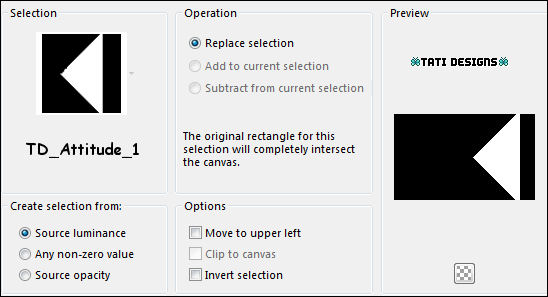
Selections / Load/Save / Load Selection from Disk: choose "TD_Attitude_1":
≈ Step 23 ≈
Selections / Promote Selection to Layer.
≈ Step 24 ≈
Selections / Select None.
≈ Step 25 ≈
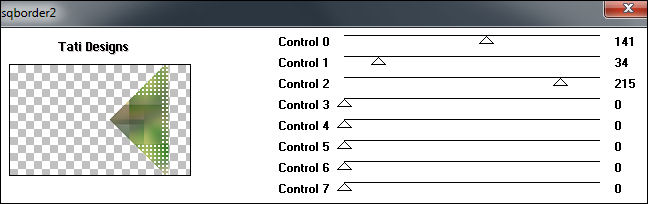
Effects / Plugins / AFS Import / Sqborder2:
≈ Step 26 ≈
Set your Backgroundcolor to (4) #ffffff 
≈ Step 27 ≈
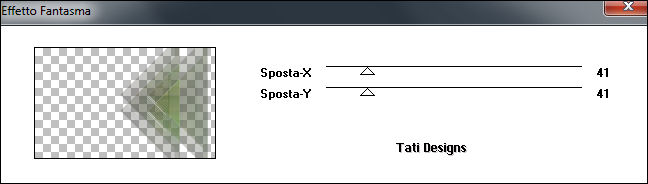
Effects / Plugins / Italian Editors Effect / Effeto Fantasma:
≈ Step 28 ≈
Effects / Edge Effects / Enhance.
≈ Step 29 ≈
Change the Blend Mode to "Overlay" and lower the Opacity to 60.
≈ Step 30 ≈
Effects / 3D Effects / Drop Shadow: 0 / 0 / 60 / 20 / Black 
≈ Step 31 ≈
Set your Foregroundcolor to (3) #5a4db1 
≈ Step 32 ≈
Layers / New Raster Layer and fill in the Foregroundcolor.
≈ Step 33 ≈
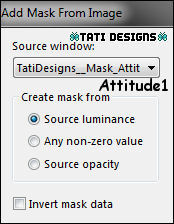
Open the mask "TatiDesigns_Mask_Attitude1" and return to your work.
≈ Step 34 ≈
Layers / New Mask Layer / Fron Image:
Before merging, duplicate the mask layer 3 times:
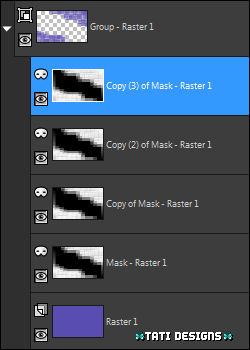
Layers / Merge / Merge Group.
≈ Step 35 ≈
Effects / Plugins / Toadies / What are you?..:
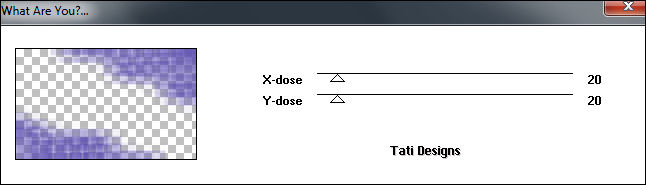
Note: Remember that you must have the white color in the Background.
≈ Step 36 ≈
Effects / Edge Effects / Enhance More.
≈ Step 37 ≈
Change the Blend Mode to "Overlay".
≈ Step 38 ≈
Layers / New Raster Layer and fill with the Background color (4) #ffffff
≈ Step 39 ≈
Open the mask "TatiDesigns__Mask_Attitude2" and return to your work.
≈ Step 40 ≈
Layers / New Mask Layer / Fron Image:

Layers / Merge / Merge Group.
≈ Step 41 ≈
Change the Blend Mode to "Overlay" and lower the Opacity to 80.
≈ Step 42 ≈
Layers / New Raster Layer and fill with the Background color (4) #ffffff
≈ Step 43 ≈
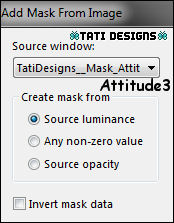
Open the mask "TatiDesigns__Mask_Attitude3" and return to your work.
≈ Step 44 ≈
Layers / New Mask Layer / Fron Image:
Layers / Merge / Merge Group.
≈ Step 45 ≈
Change the Blend Mode to"Dodge" and lower the Opacity to 50.
≈ Step 46 ≈
Layers / New Raster Layer.
≈ Step 47 ≈
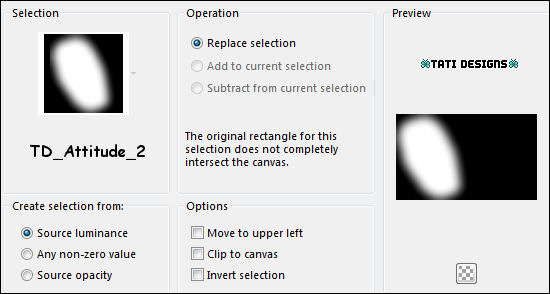
Selections / Load/Save / Load Selection from Disk: choose"TD_Attitude_2":
≈ Step 48 ≈
Fill the Selection with the color (3) #5a4db1
≈ Step 49 ≈
Selections / Select None.
≈ Step 50 ≈
Adjust / Blur / Gaussian Blur to 30.
≈ Step 51 ≈
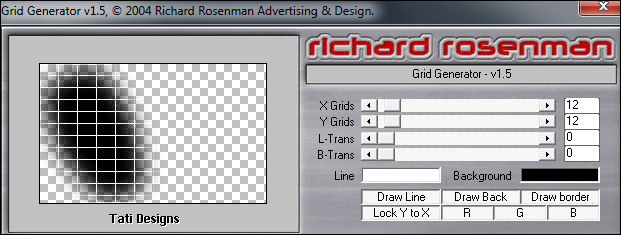
Effects / Plugins / Richard Rosenman / Grid Generator:
≈ Step 52 ≈
Change the Blend Mode to "Screen".
≈ Step 53 ≈
Open the tube "TD_Deco1_Attitude" and copy.
Return to your work and paste as new layer.
≈ Step 54 ≈
Activate Tool "Pick" (K) and modify the positions of X (0,00) and Y (97,00):

Press the "M" key to deactivate the "Pick" Tool.
≈ Step 55 ≈
Open the tube "TD_Deco2_Attitude" and copy.
Return to your work and paste as new layer.
≈ Step 56 ≈
Activate Tool "Pick" (K) and modify the positions of X (10,00) and Y (102,00):
Press the "M" key to deactivate the "Pick" Tool.
≈ Step 57 ≈
Open the tube "TD_Wordart_Attitude" and copy.
Return to your work and paste as new layer.
≈ Step 58 ≈
Activate Tool "Pick" (K) and modify the positions of X (539,00) and Y (380,00):
Press the "M" key to deactivate the "Pick" Tool.
≈ Step 59 ≈
Effects / 3D Effects / Drop Shadow: 3 / 3 / 50 / 5 / Black
≈ Step 60 ≈
Image / Add Borders / Symmetric - 1 pixel / Color: #000000
Image / Add Borders / Symmetric - 5 pixels / Color: #ffffff
Image / Add Borders / Symmetric - 1 pixel / Color: #000000
Image / Add Borders / Symmetric - 15 pixels / Color: #ffffff
Image / Add Borders / Symmetric - 1 pixel / Color: #000000
≈ Step 61 ≈
Selections / Select All.
≈ Step 62 ≈
Image / Add Borders / Symmetric - 50 pixels / Color: #ffffff
≈ Step 63 ≈
Effects / 3D Effects / Drop Shadow: 0 / 0 / 60 / 20 / Black
≈ Step 64 ≈
Selections / Select None.
≈ Step 65 ≈
Open the main tube of your choice again and copy.
Return to your work and paste as new layer.
Resize if necessary. Move it to the left.
If you use the same tube as me:
Image / Resize: 70% ("Resize All Layers" - Not checked).
Activate Tool "Pick" (K) and modify the positions of X (11,00) and Y (9,00):
Press the "M" key to deactivate the "Pick" Tool.
≈ Step 66 ≈
Adjust / Sharpness / Sharpen.
≈ Step 67 ≈
Effects / 3D Effects / Drop Shadow: 10 / 10 / 60 / 15 / Black
≈ Step 68 ≈
Layers / New Raster Layer and add your name or watermark.
≈ Step 69 ≈
Image / Add Borders / Symmetric - 1 pixel / Color: #000000
≈ Step 70 ≈
Image / Resize: Width 900 pixels (Resize All Layers" - Checked).
≈ Paso 71 ≈
Adjust / Sharpness / Sharpen.
≈ Step 72 ≈
Export your work as an optimized .jpg file.
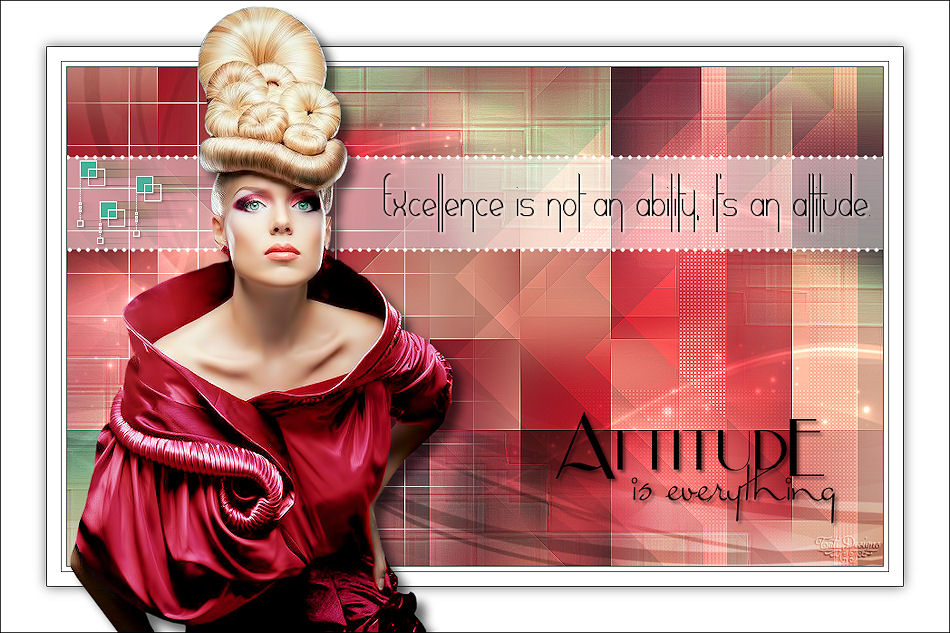
It's over!
I hope you liked it and enjoyed it.
.:. Another version of the tutorial with a tube by Isa .:.
.:. If you want to send me your work with the result of this tutorial, contact me .:.
.:. Here you can see other versions of the tutorial .:.