The tutorial:
******
01
Open a new Transparent image 900 X
550px
Fill the image with the Foreground
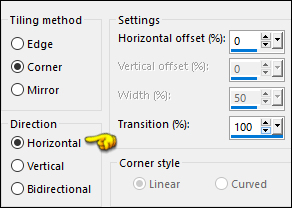
Gradient 
02
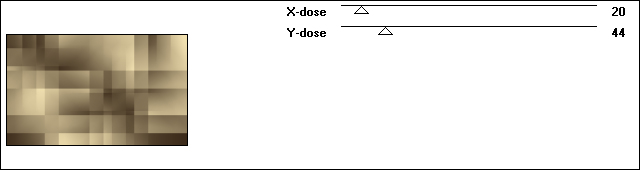
Effects - Plugins - Mehdi - Sorting
Tiles

03
Effects - Plugins - Toadies - What Are
You?
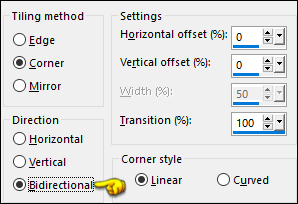
Adjust - Sharpness - Sharpen More
04
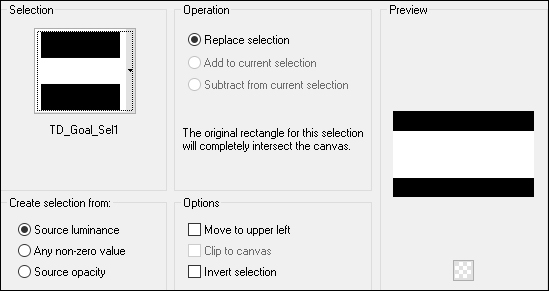
Selections - Load/Save - Load
Selection From Disk - "TD_Goal_Sel1"
Selections - Promote Selection to
Layer
Adjust - Blur - Gaussian Blur -
Radius:35
05
Effects - Plugins - Filters Unlimited
- Harrys Button Tools - Flat Button II

Note: When using
Different Colors adjust the R.G.B. sliders to match your
work
Selections - Select None
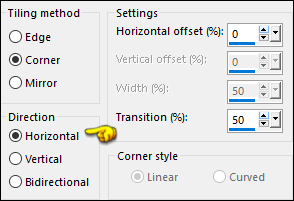
06
Effects - Image Effects - Seamless
Tiling
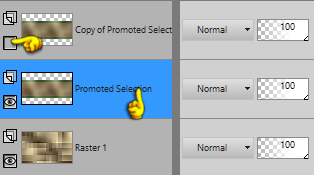
07
Layers - Duplicate
Close the Top Layer and click on the
Layer below
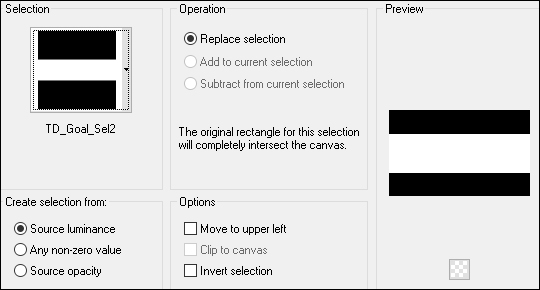
08
Selections - Load/Save - Load
Selection from Disk - "TD_Goal_Sel2"
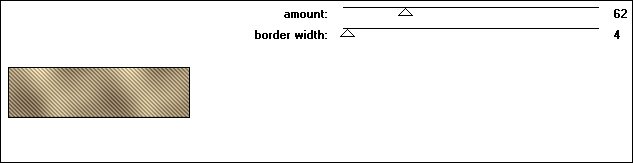
09
Effects - Plugins - penta.com - jeans
- Default settings
Selections - Select None
10
Click on the Top Layer and open it
Image - Resize - 81% - Resize All
Layers - Not Checked
11
Effects - Image Effects - Seamless
Tiling
Change the Blend Mode to
Overlay
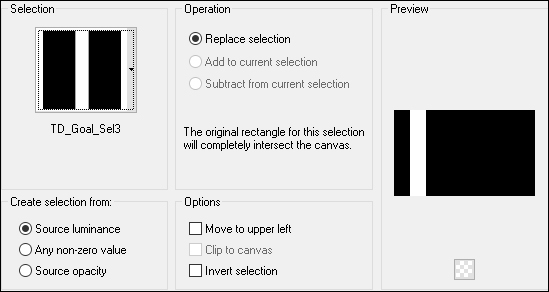
12
Layers - New Raster Layer
Selections - Load/Save - Load Selection from Disk -
"TD_Goal_Sel3"
Effects - 3D Effects - Drop Shadow:
0/-50/50/50 Color:49746a

Selections - Select None
13
Effects - Plugins - AP [Lines] - Lines
- SilverLining - Vertical

14
Layers - Duplicate
Image - Mirror - Mirror Horizontal
Layers - Merge - Merge Down
Change the Blend Mode to
Overlay
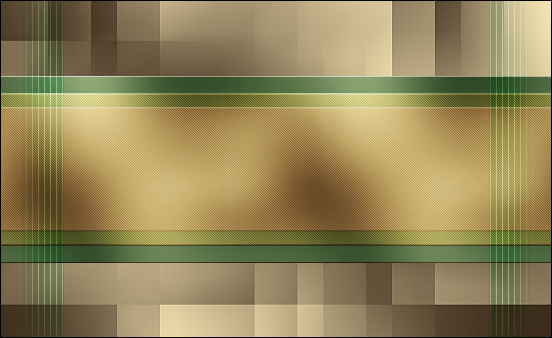
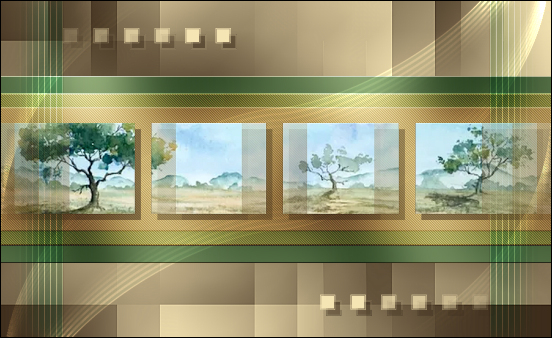
Result:
15
Layers - Duplicate
Effects - Image Effects - Seamless
Tiling
16
Effects - Geometric Effects - Skew
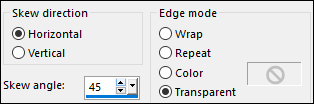
Effects - Geometric Effects - Cylinder
Vertical - Strength: 100
Change the Blend Mode to Dodge
Effects - Edge Effects -
Dilate
17
Open "TD_Image_Goal" from tray
Edit - Copy
On your work image: Edit - Paste -
Paste As New Layer
18
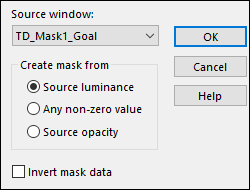
Layers - New Mask Layer - From Image -
TD_Mask1_Goal"
Layers - Merge - Merge Group
Effects - 3D Effects - Drop Shadow: 10/10/50/0
Color: #3b2a19

Adjust - Sharpness - Sharpen
19
Layers - New Raster Layer
Fill the Layer with Color: #f6e5b4

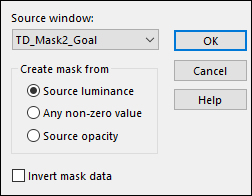
Layers - Mew Mask Layer - From Image -
"TD_Mask2_Goal"
Layers - Merge - Merge Group
Effects - 3D Effects - Drop Shadow: 10/10/50/0
Color: #3b2a19
Result:
20
Layers - New Raster Layer
Selections - Load/Save - Load Selection from Disk -
"TD_Goal_Sel4"
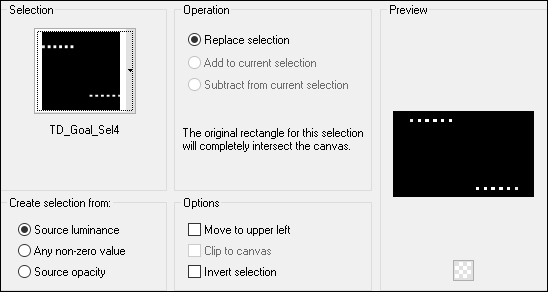
Fill the Selection with
Color: #49746a
21
Effects - Plugins - penta.com - jeans
- Default settings

Adjust - Sharpness - Sharpen
Selections - Select None
22
Open "TD_Texto_Goal" from tray
Edit - Copy the Middle Layer
On your work image: Edit - Paste -
Paste As New Layer
Pick Tool (K)

Enter these paramteres for the X: and
Y: positions on the Toolbar
X: 105.00 Y:
131.00
Press M to close the
Pick Tool
23
Click on the Bottom Layer
Layers - New Raster Layer
Fill the Layer with Color: #958242

Layers - New Mask Layer - From Image -
"TD_Mask3_Goal"
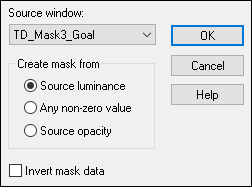
Layers - Merge - Merge Group
Change the Blend Mode to Dodge
Layers - Merge - Merge Visible
24
Edit - Copy
Image - Add Borders - Symmetric
checked - 1px - #3b2a19
Image - Add Borders - Symmetric checked - 5px - #ffffff

Image - Add Borders - Symmetric checked - 1px - #3b2a19
Image - Add Borders - Symmetric
checked - 50px - #ffffff
25
Magic Wand:

Select the last border
Edit - Paste - Paste Into Selection
Selections - Promote Selection to
Layer
26
Adjust - Blur - Gaussian Blur -
Radius: 35
Selections - Invert
Effects - 3D Effects - Drop Shadow: 10/10/80/0
Color: #3b2a19
Effects - 3D Effects - Drop Shadow: -10/-10/80/0
Color: #3b2a19
Selections - Select None
27
Image - Add Borders - Symmetric
checked - 1px - #3b2a19
Image - Add Borders - Symmetric
checked - 10px - #ffffff
Image - Add Borders - Symmetric
checked - 1px - #3b2a19
Image - Add Borders - Symmetric
checked - 30px - #ffffff
28
Open "Leny-vrouw557" from tray
Edit - Copy the Middle layer
On your work image: Edit - Paste
- Paste As New Layer
Image - Resize - 95% - Resize All
Layers - Not Checked
29
Pick Tool (K)
Enter these paramteres for the X: and
Y: positions on the Toolbar
X: 324.00 Y: 45.00
Press M to close the
Pick Tool
Adjust - Sharpness - Sharpen
30
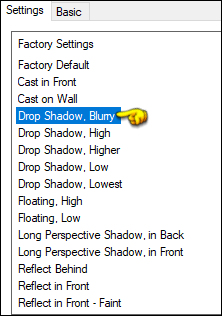
Effects - Plugins - Eye Candy 5 -
Impact - Perspective Shadow - Preset - Drop Shadow
Blurry
31
Open "TD_Titulo_Goal" from tray
Edit - Copy the Middle Layer
On your work image: Edit - Paste - Paste As New Layer
32
Pick Tool (K)
Enter these paramteres for the X: and
Y: positions on the Toolbar
X: 681.00 Y:
557.00
Press M to close the
Pick Tool
Effects - 3D Effects - Drop Shadow:
5/5/50/10 Color: #3b2a19
Image - Add Borders - Symmetric checked - 1px - #3b2a19
33